The Story Behind the Forge at Wicks Forge
Warning: this is a post really nerding out about forges.
One of the best things about being a blacksmith, is the fact that our craft allows us to make many of the tools needed for blacksmithing— hammers, tongs, chisels, jigs, and so on. It’s almost like blacksmiths were the original 3D printer of the craft world.
Nowadays, it’s usually just faster and easier to purchase such tools— a $5 yard sale hammer will move steel just like a hammer that takes hours to make.
That being said, the forge is the main tool that enables us blacksmiths to actually do blacksmithing. Regardless of all the other processes we use to make our line of products, the one thing that all of our pieces have in common is that at some point they were heated up in the forge.

We’ve always used homemade forges here in the shop. Initially, this was for financial reasons-- since a brand new forge can run you several hundred dollars at its cheapest. But, as Wicks Forge has grown, our needs have become more specific. Now, a custom built forge is the only way to ensure that all of the varied tasks we have can be accommodated for on a daily basis.
Here is the first homemade forge we ever developed:

This shop forge was completely homemade using scrap metal components. It worked well, but used an incredible amount of fuel because of the large internal volume and inefficient burner system. Every design that came after was an attempt to fine tune each component-- so the final product would be even more efficient than the last.
About a year ago, we designed and built our latest forge. It’s the sixth forge we’ve ever built, and the fifth propane one.
Keep reading to find out how we did it.
The Requirements
There were a few specific tasks and functions we needed this forge to fulfill:
- SIZE - We wanted something that one to four people could use at the same time, so it needed to have a lot of surface area inside.
- HEIGHT - While most of the time it wouldn’t need a lot of height clearance, sometimes we would need to be able to fit irregular shaped pieces or multiple pieces in the forge at the same time--something which happens often when we heat pieces during our finishing process.
- FUEL CONSUMPTION & TEMPERATURE - It also needed to be able to be worked from both ends while still maintaining its temperature. However, we didn’t want it to work overtime when it was being used by a single person, as this would lead to excessive fuel consumption. Not to mention, the forge is used every single day and stays lit for hours on end, so we needed something as fuel efficient as possible.

The Forge
To meet all of these needs we decided to go with a ribbon burner style forge that incorporated adjustable ceiling and walls. The final product is a forge that serves all of our needs and helps us be efficient in both our production process and fuel consumption.
Here’s a breakdown of how it works:
Size
The side walls of the forge are blocks made out of a steel frame, ceramic insulation, and covered in refractory. When lots of folks are using the forge simultaneously, we can move these blocks out to maximize the surface area in the forge.
However, if only one person is using the forge, the blocks can be moved in to cut the surface area in half, which also halves the total internal volume that needs to be heated.

To accomplish this, we offset the placement of the ribbon burner to one side slightly. This has the added benefit of creating a slight variation in temperature in the forge, so we can position our metal in different spots depending on the needed heat temperature to work the piece.

Height
The ceiling of the forge is also made of a steel frame with ceramic installation and an outer layer of refractory. It’s attached to an outer support frame, which allows it to be raised up to as much as double its normal height. We have additional insulated blocks for the walls, which can then be slotted in place to accommodate the new height.

When creating the ceiling of the forge, we use reinforcement bars to help support the poured structure.

Temperature & Fuel Efficiency
In the early days we used homemade Venturi burners and later upgraded to a T-Rex Venturi burner. While both of these were great for heating smaller forges, the ribbon burner has been way more capable of maintaining heat in this larger forge and miles more fuel efficient in doing so.
Venturi Burner
A Venturi burner works through the Venturi effect; Pressurized propane comes out of a small nozzle at the top of the burner, which creates a suction of outside air that mixes with the propane and is ignited at the end of the burner.
Because the burner uses that outside air, it is called a naturally aspirated burner. If you want to burn hotter, you need to increase the pressure of the propane, which then pulls in additional air from the side ports of the burner.

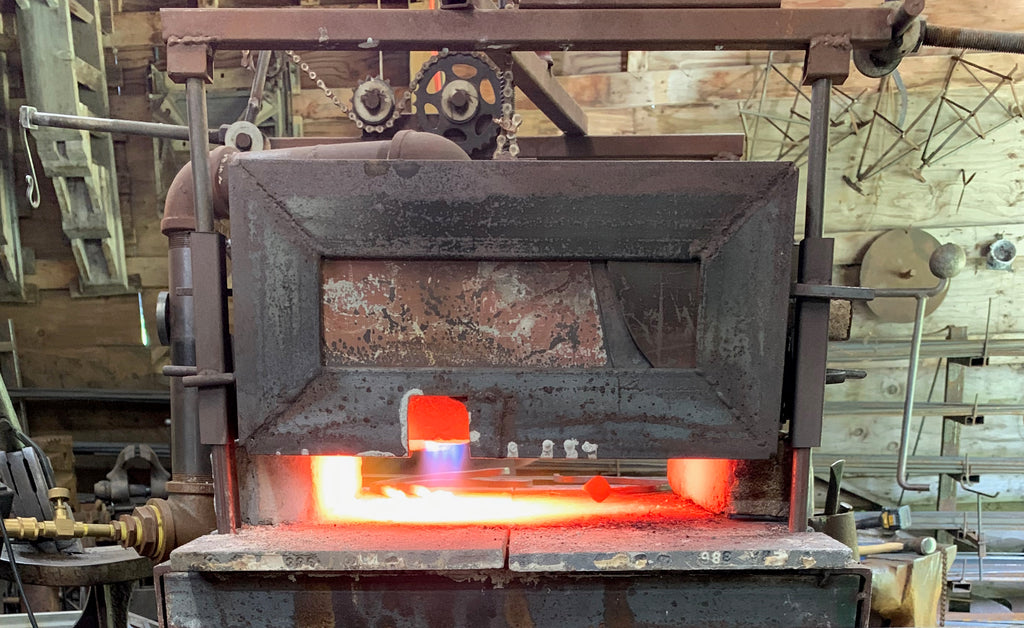
Above is an image of us test firing and tuning our original homemade venturi style burner system.
Ribbon Burner
A ribbon burner on the other hand uses a dedicated fan to supply air through a pipe. Propane is introduced to this pipe and mixes with the air before igniting once it reaches the forge. As the air is artificially supplied, it can be controlled independently of the propane’s pressure-- resulting in a much more fuel efficient system.
The other major difference that contributes to fuel efficiency in this system is there are several small holes at the end of the burner, which become mini jet flames when the burner is in use. These mini flames combust the fuel completely and more efficiently than a Venturi burner, which only creates one big jet flame at the end of the burner.

Photographed above is the process for making a ribbon burner. Crayons are used to create holes for the burner when pouring the high temperature castable for the burner.
Final Thoughts
After more than a year of daily use, there were inevitably a few design tweaks we incorporated into the forge. For example, we went with a slightly thicker layer of refractory on the inside of the forge, which will help with longevity. But the biggest improvement by far was switching from a Venturi burner style to the ribbon burner for the heat.
Overall it’s been an incredibly useful upgrade from our previous forges. Having a forge designed and built with our needs in mind has been the key to maximizing the efficiency of our whole production process.
For blacksmiths, having the right tools for the job is essential to delivering great products to the customer. At Wicks Forge, these tools are ones that save us both time, money, and have a reduced impact on the planet. We know our customers appreciate the thought that goes into our work, which is what makes the beautiful, yet functional items we offer both accessible and affordable to the everyday individual.
If you’re interested in learning more about designing or building your own forge, have a look at some resources we found useful in designing ours:
Ribbon Burner
Video: How to Build a Ribbon Burner - Old Hickory Forge
Video: What is a Ribbon Burner? - Essential Craftsman
Venturi Burner
Book: Gas Burners for Forges, Furnaces, and Kilns - Michael Porter
Website: T-Rex burner - Hybrid Burners
Forge design
Laisser un commentaire